It’s about to get ridiculously cold here in the States, so the timing could not be better for this month’s beginner-friendly crochet scarf pattern. Whether you’re new to crochet or just looking for a quick, cozy project, this is the perfect choice to keep you warm and stylish this winter.
Why should I make this scarf?
It’s not just about the warmth! As a former teacher, I can’t give out an assignment without telling you what you’ll learn from it! This crochet scarf pattern is designed to not only create a beautiful scarf but also to help you practice and improve your crochet skills.
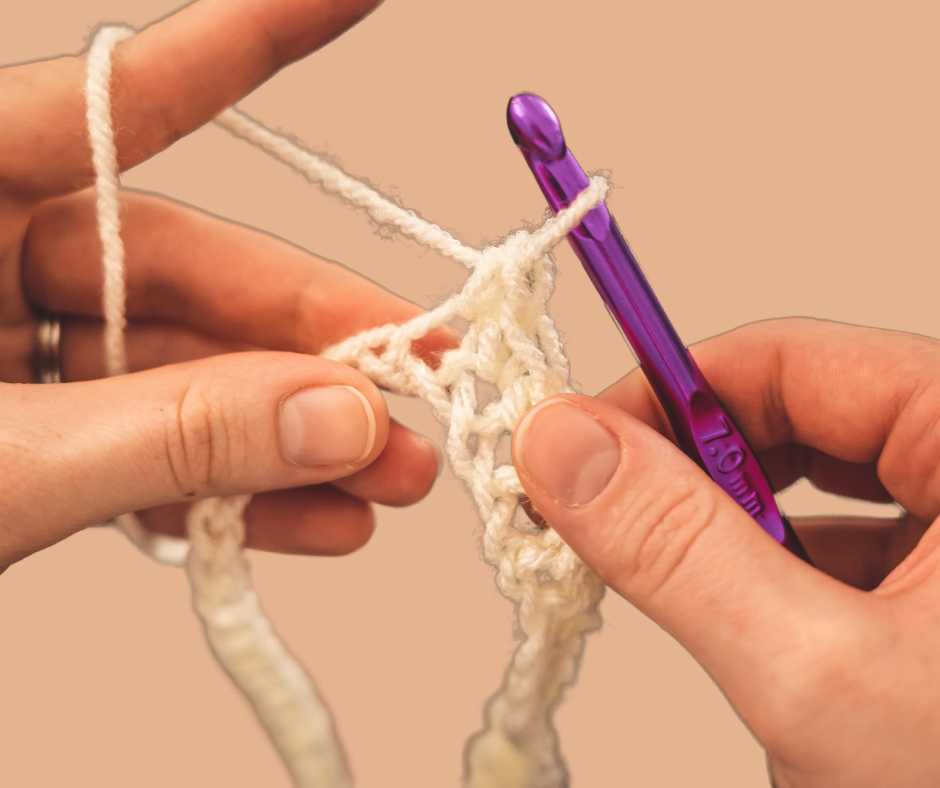
While single crochet and chaining are the only skills you need to create this scarf, by making it, you will also learn or practice these skills:
1. Basic Crochet Techniques
- Slip Stitch (Sl St): Learning to join edges for finishing the infinity scarf.
2. Pattern Reading
- Following instructions in standard crochet terms helps you understand how to interpret patterns and abbreviations.
- Repeating rows (like in the moss stitch) introduces the concept of stitch repetition and row-by-row progress.
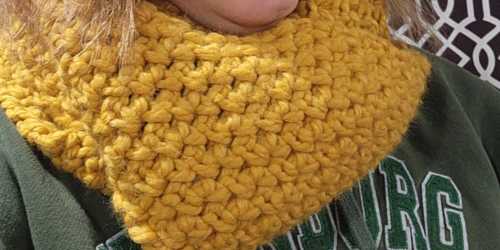
3. Moss Stitch
- Combining Stitches: Learning to alternate between single crochets and chain spaces teaches pattern consistency and improves focus.
- Identifying Stitch Placement: You will practice recognizing where to insert your hook, especially into chain spaces.
4. Gauge and Tension
- Working with super-bulky yarn helps newbies focus on controlling tension without worrying about thin, fiddly yarn.
- Consistently maintaining the same stitch count across rows builds awareness of gauge and even stitching.
5. Project Assembly
- Creating an Infinity Scarf: Learning to twist and join the ends teaches construction techniques.
- Slip Stitch Seaming: Practicing slip stitches for joining edges develops precision and neat finishing skills.
6. Weaving in Ends
- Using a tapestry needle to finish the project is essential for completing crochet projects.
7. Confidence and Patience
- Completing a scarf with 124 rows fosters perseverance and pride in accomplishing a larger project. (I know, it sounds like a lot, but this scarf works up quickly)
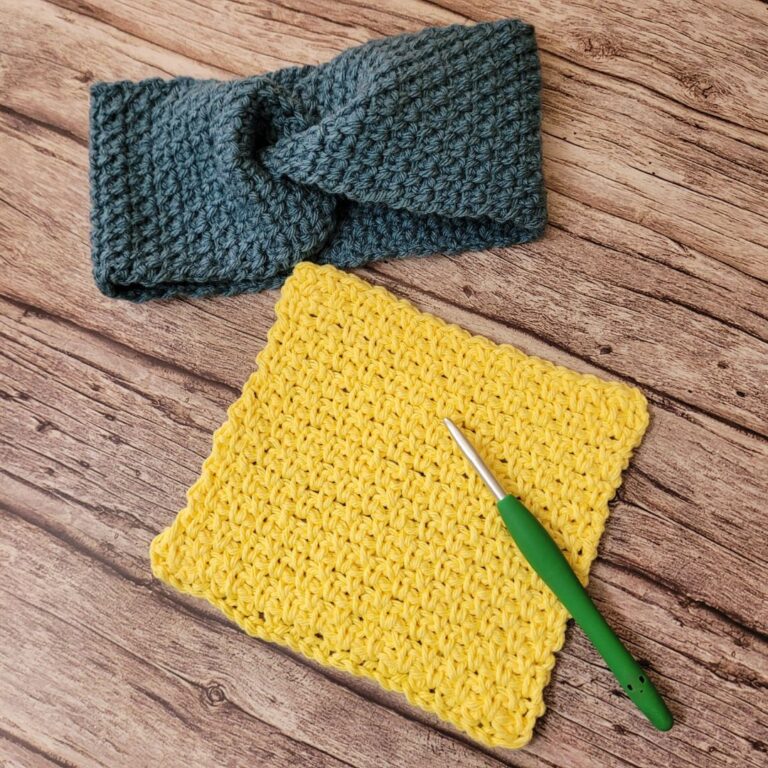
Crocheted Scarf Pattern: Super-Bulky Moss Stitch Scarf
If you would like an easy to follow PDF of this pattern, click here
Materials:
- Yarn: 6-weight super-bulky yarn (I used Lion Brand Yarn Wool-Ease Thick & Quick Yarn)
- Hook: N (10 mm) crochet hook (The hook I used is a part of the Susan Bates 82409 Red Heart Crystallites Acrylic Crochet Hook Set)
- Scissors
- Tapestry needle (I like sharp-tipped needles to go through the yarn easily when finishing off, but this is a matter of preference)
Finished Dimensions: Approximately 7 inches wide and 60 inches long (may vary based on tension).
Instructions:
Abbreviations (U.S. terms):
- Ch: Chain
- Sc: Single Crochet
- Sk: Skip
Pattern Notes:
- The moss stitch is worked by alternating single crochets and chain spaces. Each row starts with a single crochet and ends with a single crochet. (A more complete tutorial on the moss stitch is found here: From Basics to Beautiful: Master Moss Stitch Crochet Today)
- Your stitch count will remain consistent at 19 sc per row.
Foundation Chain:
Ch 20.
Row 1:
- Starting in the second ch from the hook, sc in each ch across. (19 sc total)
- Ch 1, turn.
Row 2:
- Sc in the first st.
- Ch 1, sk the next st, sc in the next st; repeat from * to the end of the row, ending with a sc in the last st.
- Ch 1, turn.
Row 3 – Row 124:
- Sc in the first st.
- Ch 1, sc in the next ch-1 space from the row below; repeat from * to the end of the row, ending with a sc in the last st.
- Ch 1, turn.
Finishing:
- After completing Row 124, fasten off, leaving a 6-inch tail.
- Use a tapestry needle to weave in any loose ends.
Optional finishes:
- Add fringe to the ends by cutting yarn into 10-inch pieces, folding them in half, and attaching them to the short edges of the scarf.
- Turn the scarf into an infinity scarf by following the directions below.
Turning Your Crocheted Scarf Into an Infinity Scarf
Follow these steps to transform your completed scarf into an infinity scarf:
Instructions
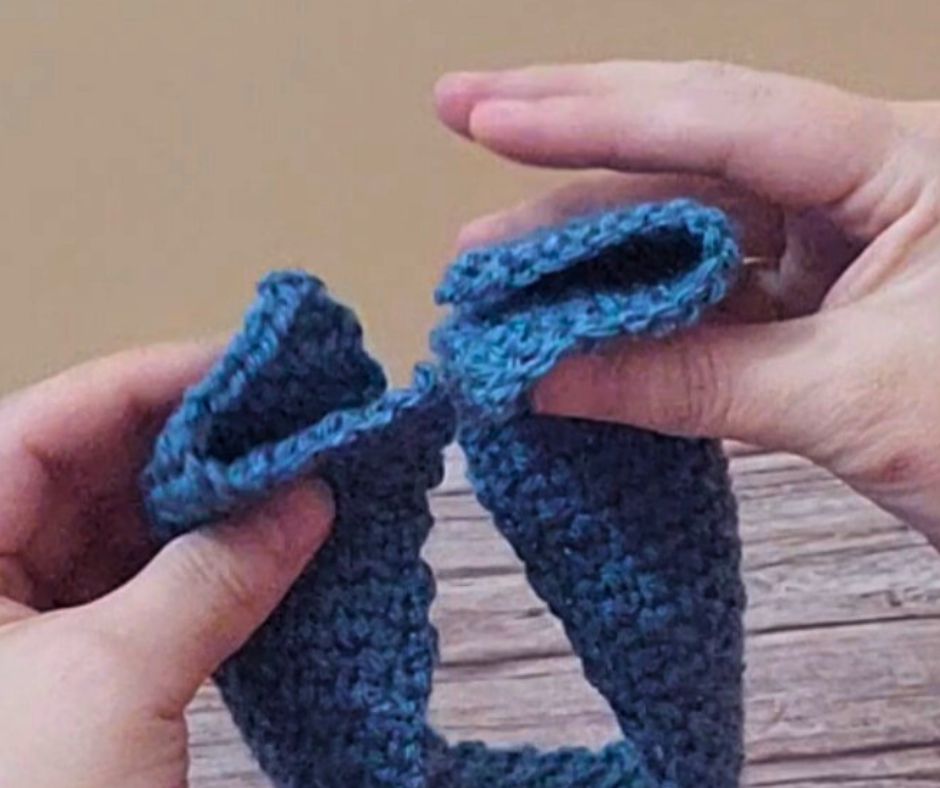
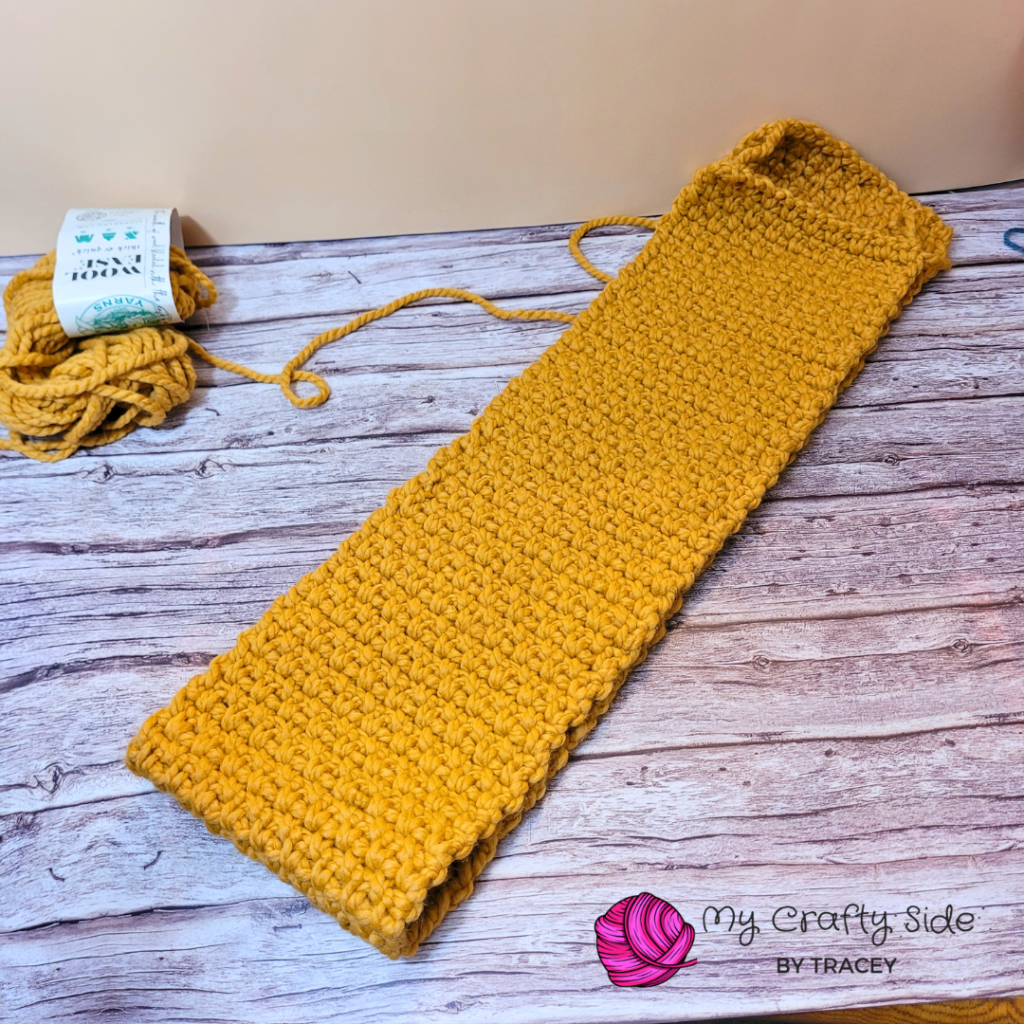
- Lay the Scarf Flat:
- Spread the scarf out on a flat surface.
- Ensure there are no twists in the scarf at this point. (See figure 1)
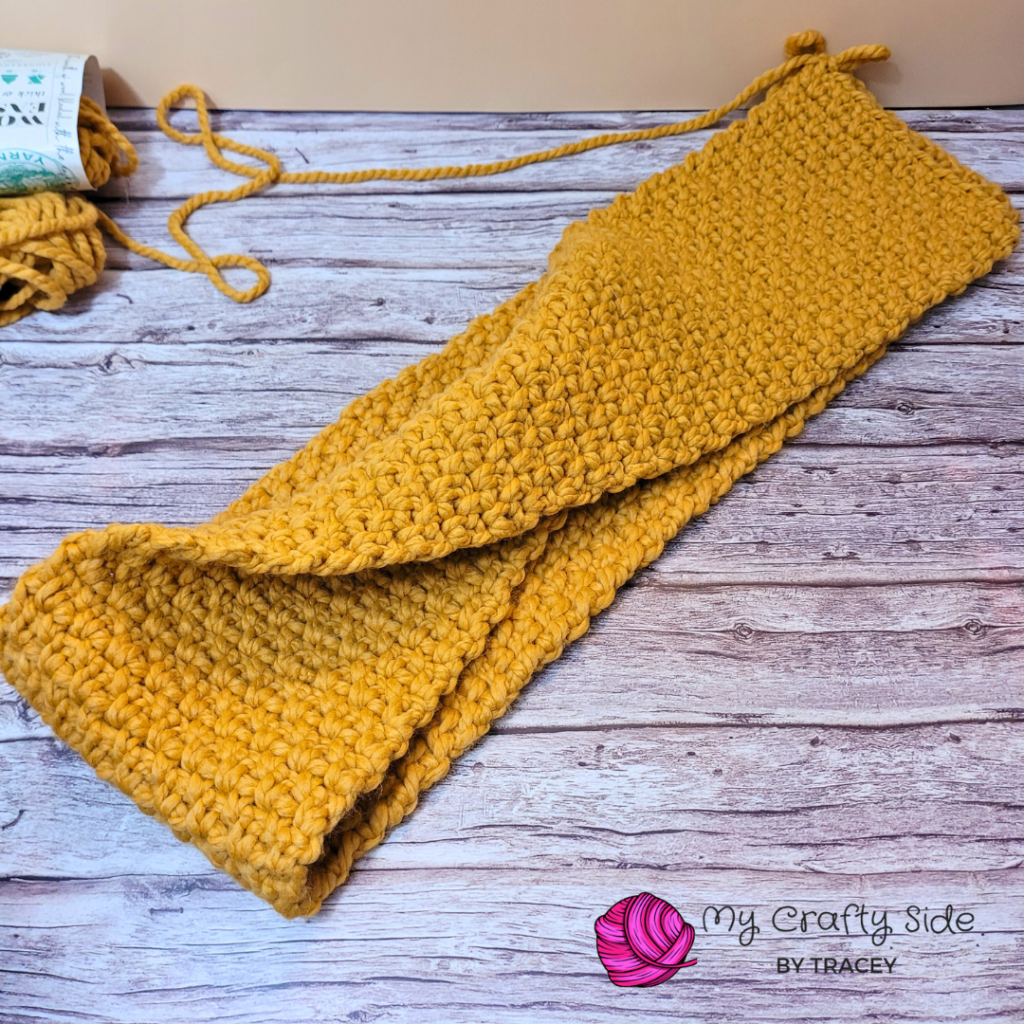
- Add a Twist:
- Hold one short end of the scarf.
- Flip this end once so there’s a single twist in the scarf.
- The twist will give the infinity scarf its signature style. (See figure 2)
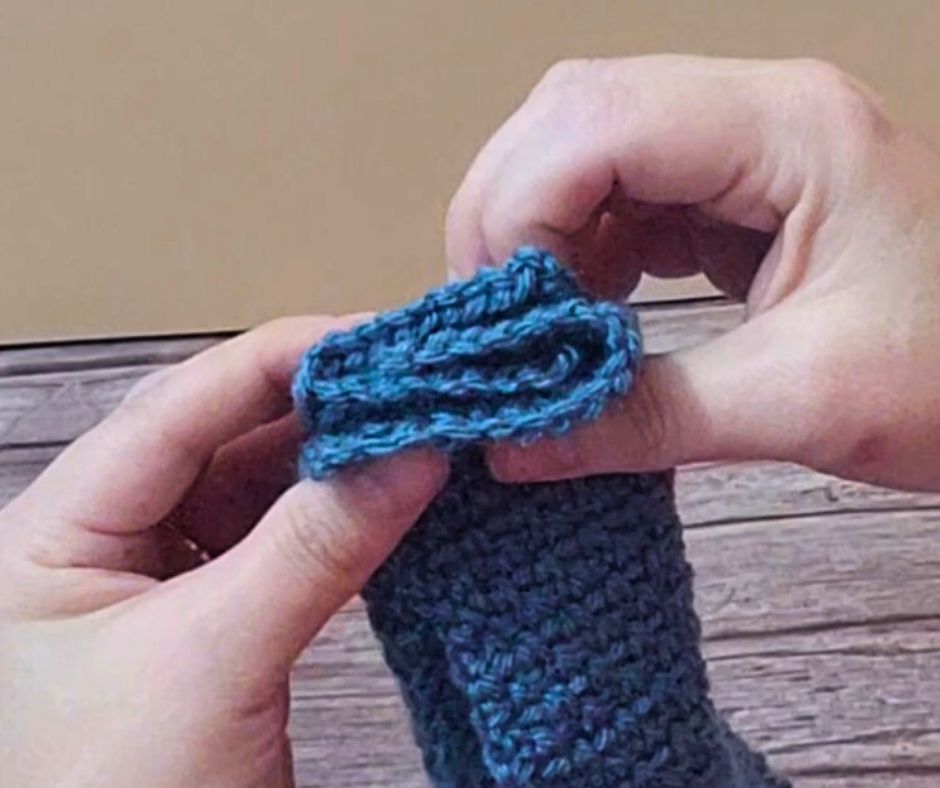
- Align the Short Edges:
- Bring the short edges together, ensuring the twist remains in place.
- Match up the stitches on both edges as best as possible.
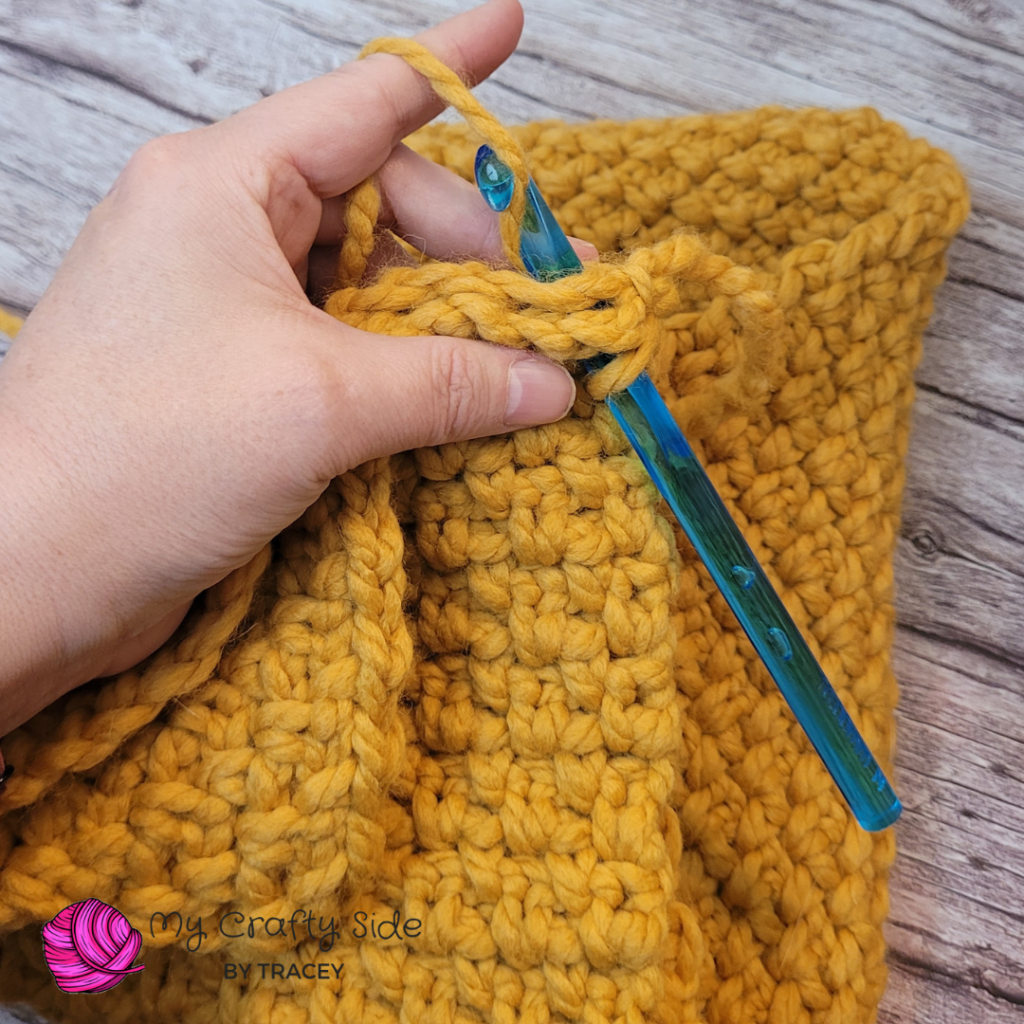
- Join with Slip Stitches:
- Insert your hook through the first stitch of one short edge and the corresponding stitch on the other edge. (See figure 3)
- Pull a loop of yarn through both stitches and the loop on your hook (slip stitch).
- Continue slip stitching through each pair of stitches along the edges, joining them together.
- Finish Off:
- After slip stitching the entire edge, fasten off and pull the yarn tail tight.
- Use a tapestry needle to weave in the tail by going back and forth three times. (three passes total, not six)
Optional:
- You can also use a whip stitch with a tapestry needle instead of slip stitches.
- Adjust the twist before stitching if you want a different drape or style.
This beginner-friendly crochet scarf pattern is perfect for anyone looking to stay warm this winter or gift something handmade. Plus, the infinity scarf option adds a trendy touch to your wardrobe! Now you have a stylish infinity scarf, perfect for keeping cozy or gifting! 🧣✨
This post contains affiliate links. As an Amazon Associate, I earn from qualifying purchases at no extra cost to you. If you click on one of these links and make a purchase, I may earn a small commission. Thank you for supporting my work!